Finally, a decision on what the boys are to wear on our big day. Still no word on what he himself will be wearing though..
Indigo slim-fit jeans
White-on-white collared shirt; half-sleeve
Silver blazer with sleeves rolled up
Black patent leather brogues
Paisley silk scarf (similar colours to bridesmaids' dresses)
Paisley pocket square (although this may clash with the idea I have for boutonnieres)
Tuesday, February 15, 2011
DIY: Paper Rosettes
In the past few weeks I've been filling my spare time with making a variety of 'hanging things' for the reception. Since it's quite a cavernous space (it used to be a church, so the roof is more than double volume), I felt we needed something to make the space more cosy and intimate.
First was the giant poms, the tutorials of which I've posted before. I've also made doily garlands and started on some paper rosettes today, inspired by Rebecca Thuss:


First was the giant poms, the tutorials of which I've posted before. I've also made doily garlands and started on some paper rosettes today, inspired by Rebecca Thuss:
I followed a little step-by-step by Paper Source. The trick is to use 3 pieces of paper for each rosette, otherwise it can be tricky to close them up at the end. (Apologies for the poor quality photos, I got lazy today and used Photobooth..)
You will need:
- 3 12x12" pieces of scrapbooking paper (I find it makes them a little more robust this way than just using ordinary copy paper)
- double-sided tape
- fishing line, ribbon etc for hanging
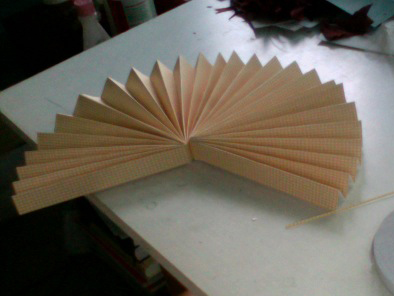
Accordion fold each piece of paper (folds about 2cm wide).

Flatten out the sheet and fold in half. Refold the pleats. (This makes the next step a bit easier).

Fold the whole thing in half and join the two ends with double-sided tape.
Repeat for the other two pieces and then join them all together! When joining the last two sides, you may want to encase your ribbon between two layers of tape so you don't need to punch a hole later.

The finished rosettes!
Subscribe to:
Posts (Atom)